Japanese Gyoza (Pan-Fried Dumplings)
(crispy bottoms, juicy filling, vegan option included)
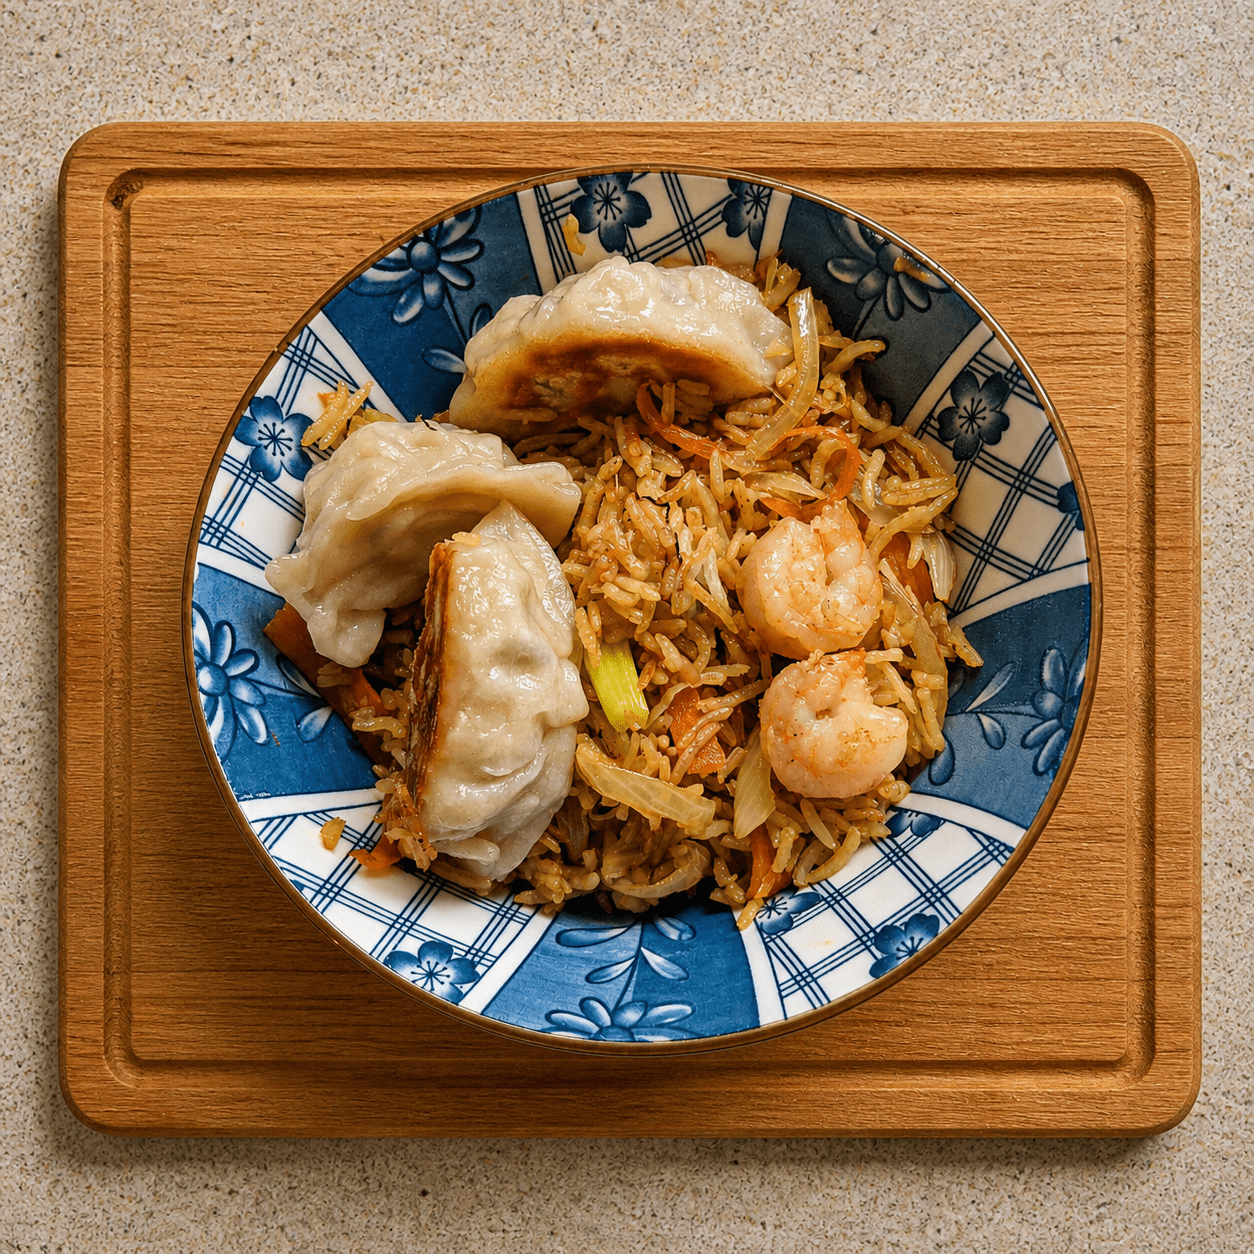
The gyoza I've been making for years, and the recipe my family asks for on repeat. The technique is the steam-fry: gyoza go into a hot pan, get a crispy golden bottom, then a splash of cornflour-water hits the pan and the lid goes on to steam them through. The result is the textural contrast that makes great gyoza great — shatteringly crispy on the bottom, soft and juicy on top, with a lacy crust that wraps around the whole thing. I've included both meat and vegan fillings because my partner is vegetarian and we make these constantly. Pair them with my chicken fried rice for a proper Japanese-takeout night at home.
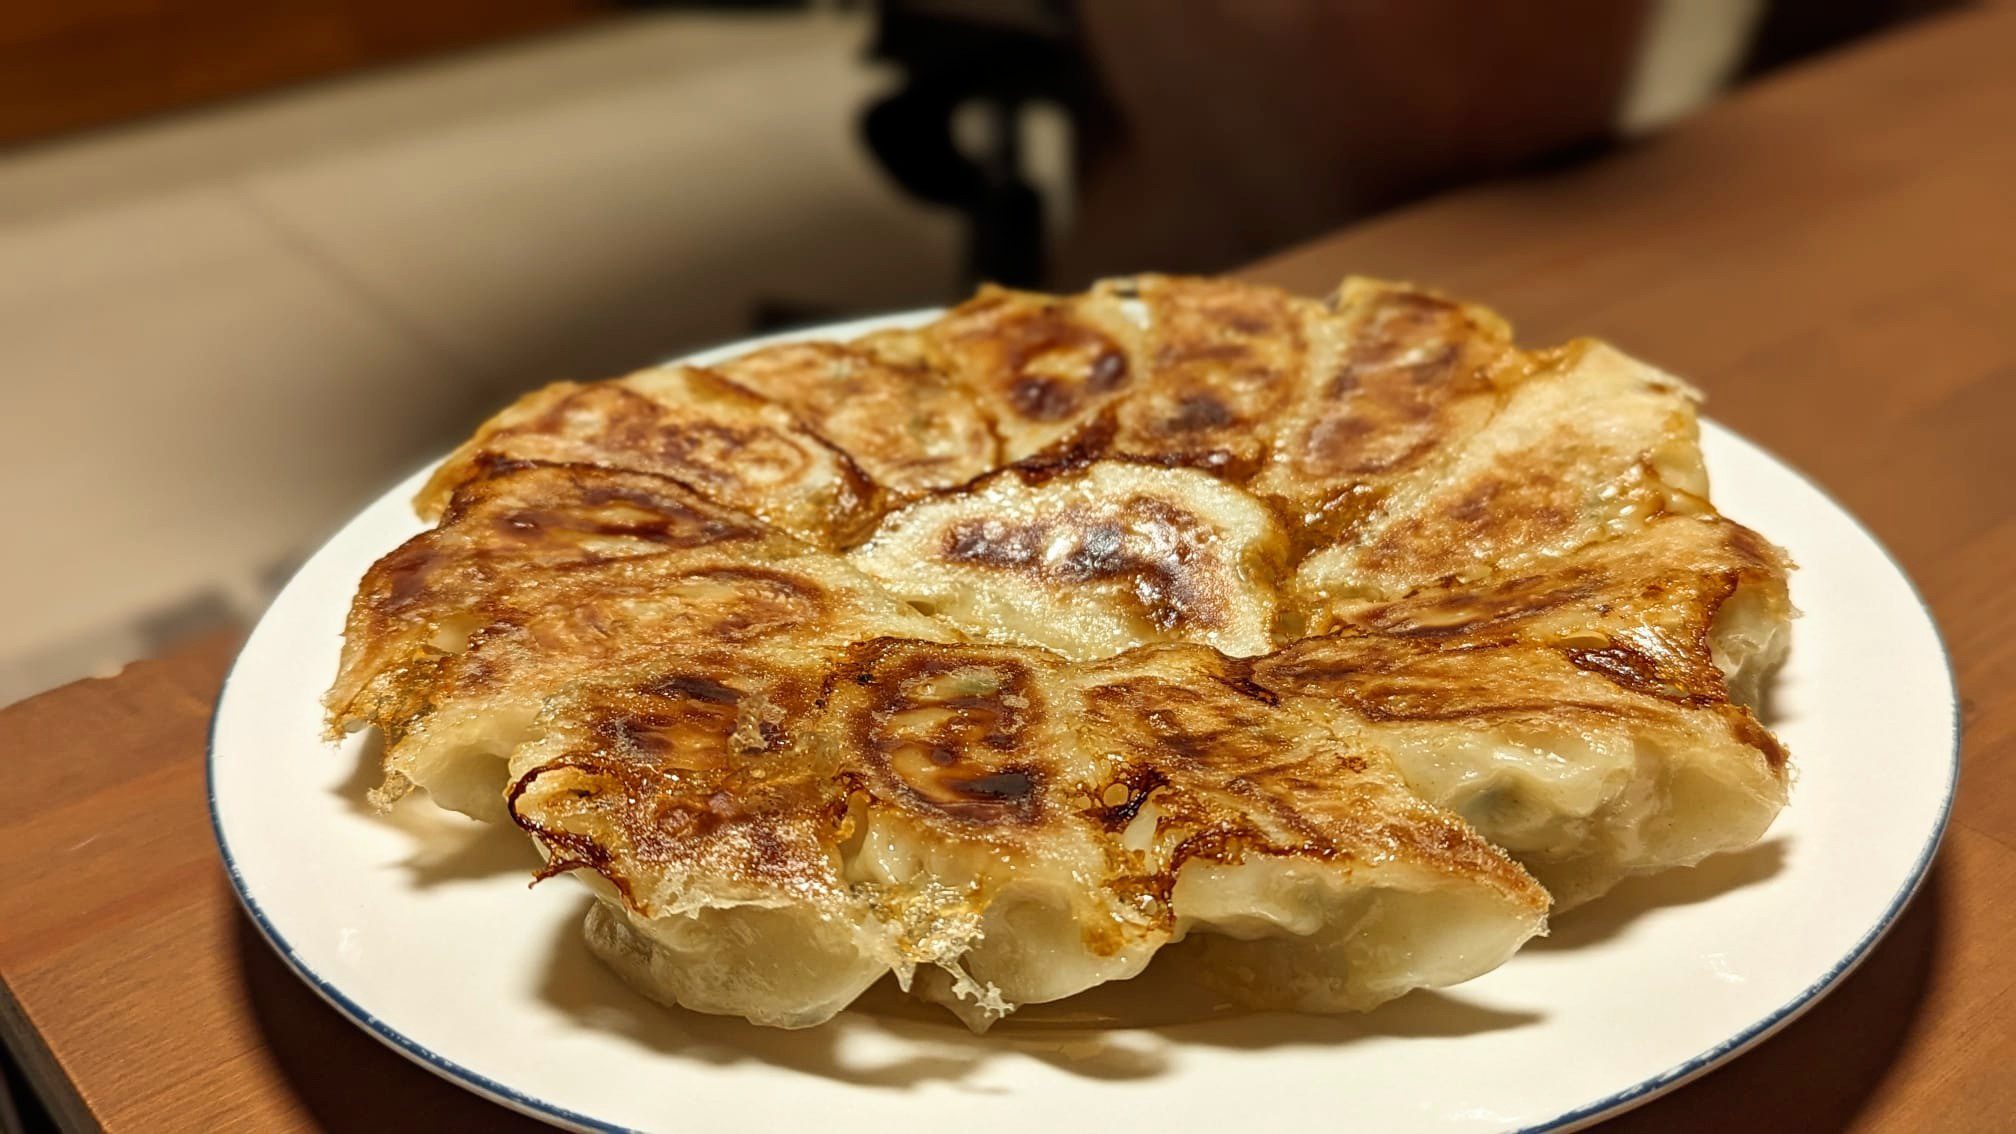
The textural contrast that makes great gyoza great — crispy underside, soft top
Why These Gyoza Work
Gyoza are deceptively simple: dumpling wrapper, savoury filling, hot pan. What separates great gyoza from sad steamed-feeling ones is the cooking method. Most home cooks treat them like potstickers and crowd them in oil — and they end up greasy or pale. The proper Japanese steam-fry gives you three textures in one bite: a crispy golden bottom, a soft top from the steam, and a delicate lacy crust that forms when cornflour is added to the steaming water.
The other piece most recipes get wrong is the cabbage. Cabbage is full of water — if you don't salt and squeeze it before mixing, that water leaks into your filling and turns the wrappers soggy from the inside. The 10-minute salt-and-squeeze step is non-negotiable.
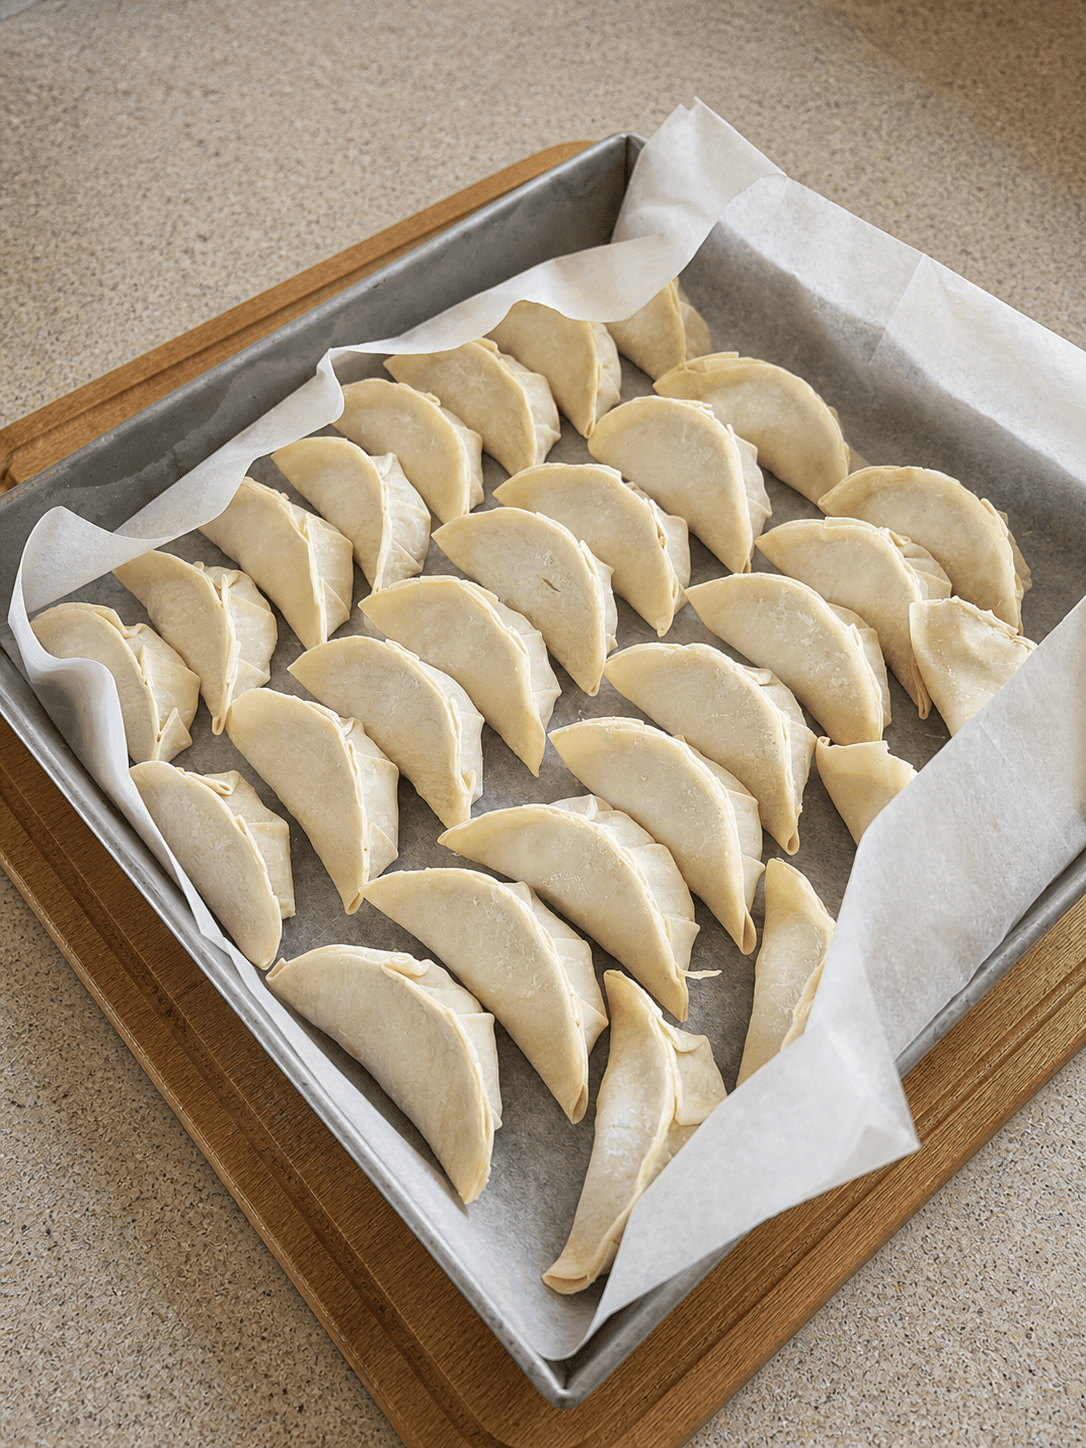
Bonus: this dough-free recipe uses store-bought wrappers, so the project is mostly chopping and folding. The first batch takes a while; by the second, you'll be turning them out two a minute. They freeze beautifully, so make a big batch and stash half for nights when you need dinner in 10 minutes.
How to Make Japanese Gyoza, Step by Step
- Finely chop the cabbage and place it in a bowl.
- Sprinkle ½ tablespoon salt over the top, mix well, and crush it with your hands.
- Let it sit for 10 minutes — you'll see liquid pool at the bottom of the bowl.
- Grab handfuls and squeeze hard over the sink, then drain. The cabbage should feel almost dry.
- Add the squeezed cabbage to a large bowl with the meat (or vegan ingredients), green onions, garlic, ginger, soy sauce, and the rest of the seasonings.
- Mix vigorously for 2–3 minutes — really go at it. The protein needs to break and bind for the filling to hold together.
- The mixture should look slightly sticky and unified, not loose.
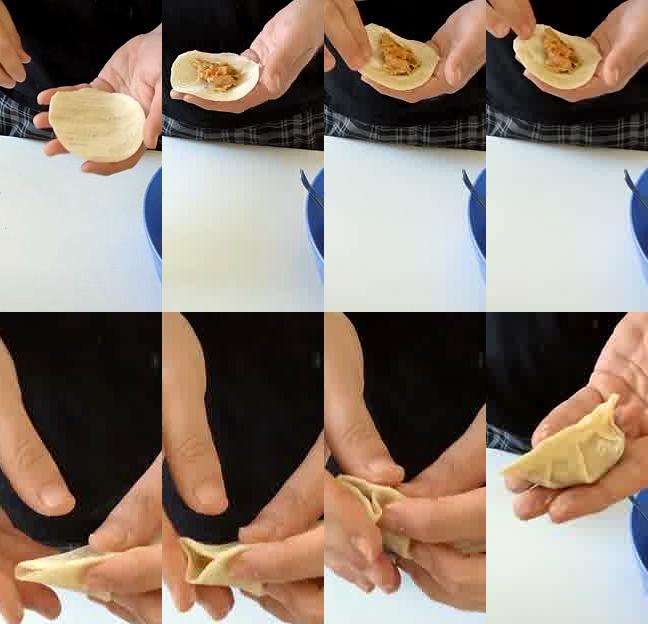
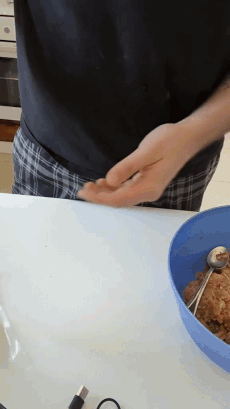
- Place a wrapper flat in your palm.
- Add about 1 tablespoon of filling to the centre — don't overfill, or sealing becomes impossible.
- Lightly wet the edge of the wrapper with your finger (a small bowl of water nearby helps).
- Fold in half into a half-moon and pinch the centre closed first, then work outward sealing the rest.
- Don't worry about pleating like a pro — a basic sealed half-moon cooks identically. Pleats are for looks.
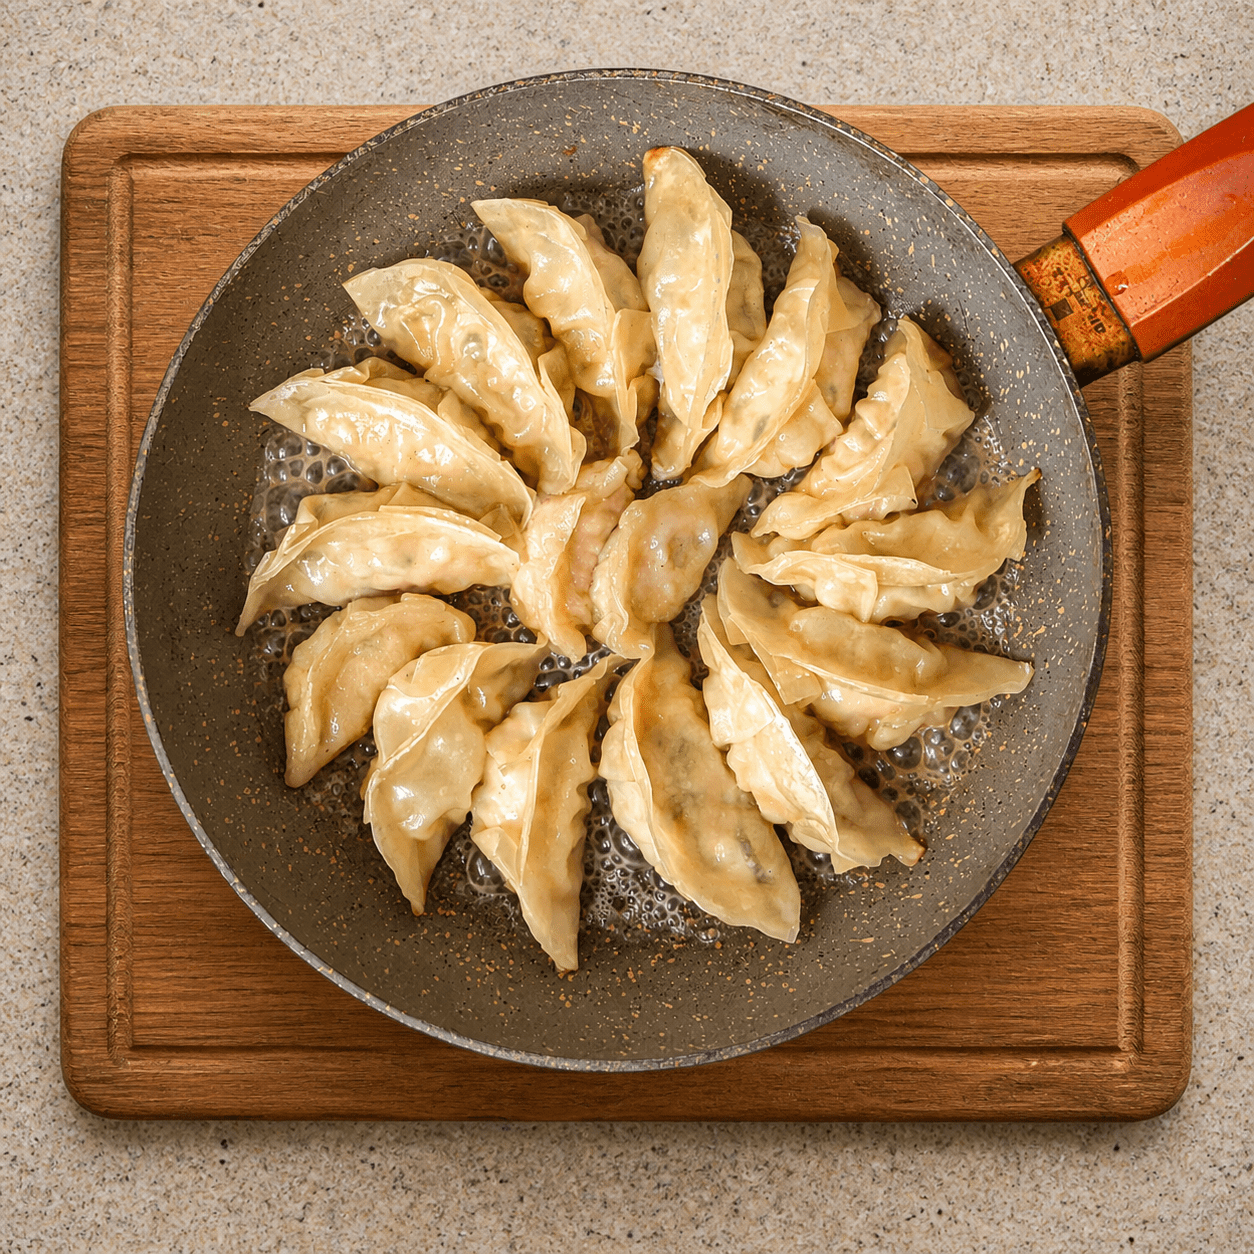
Cooking the Gyoza (the Steam-Fry)
This is the part most home cooks rush. The whole point of gyoza is that lacy crispy crust + soft top combination, and you only get it by following the sequence: oil, fry, water-and-flour slurry, lid, evaporate, flip out. Don't skip any step.
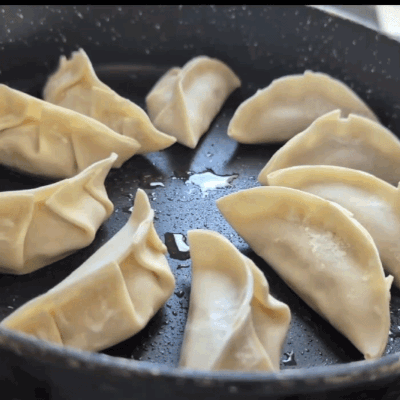
- Heat a wide, shallow non-stick pan with 1 teaspoon of neutral oil over medium-high heat.
- Place the gyoza in tightly together, flat side down — they can touch.
- Fry for 2–3 minutes, undisturbed, until the bottoms are golden brown.
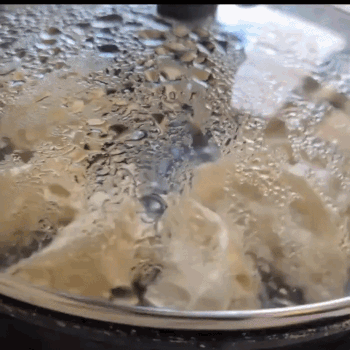
- Mix ½ cup of water with 1 teaspoon of cornflour in a small jug — whisk until no lumps.
- Pour the slurry into the pan around the gyoza. It will sizzle dramatically.
- Immediately cover with a tight-fitting lid.
- Keep the lid on for 5 minutes on medium heat — don't peek.
- The trapped steam cooks the filling through and softens the wrapper tops.
- You'll hear the sizzle change tone as the water evaporates.

- Remove the lid and cook another 2–5 minutes until all the water has evaporated.
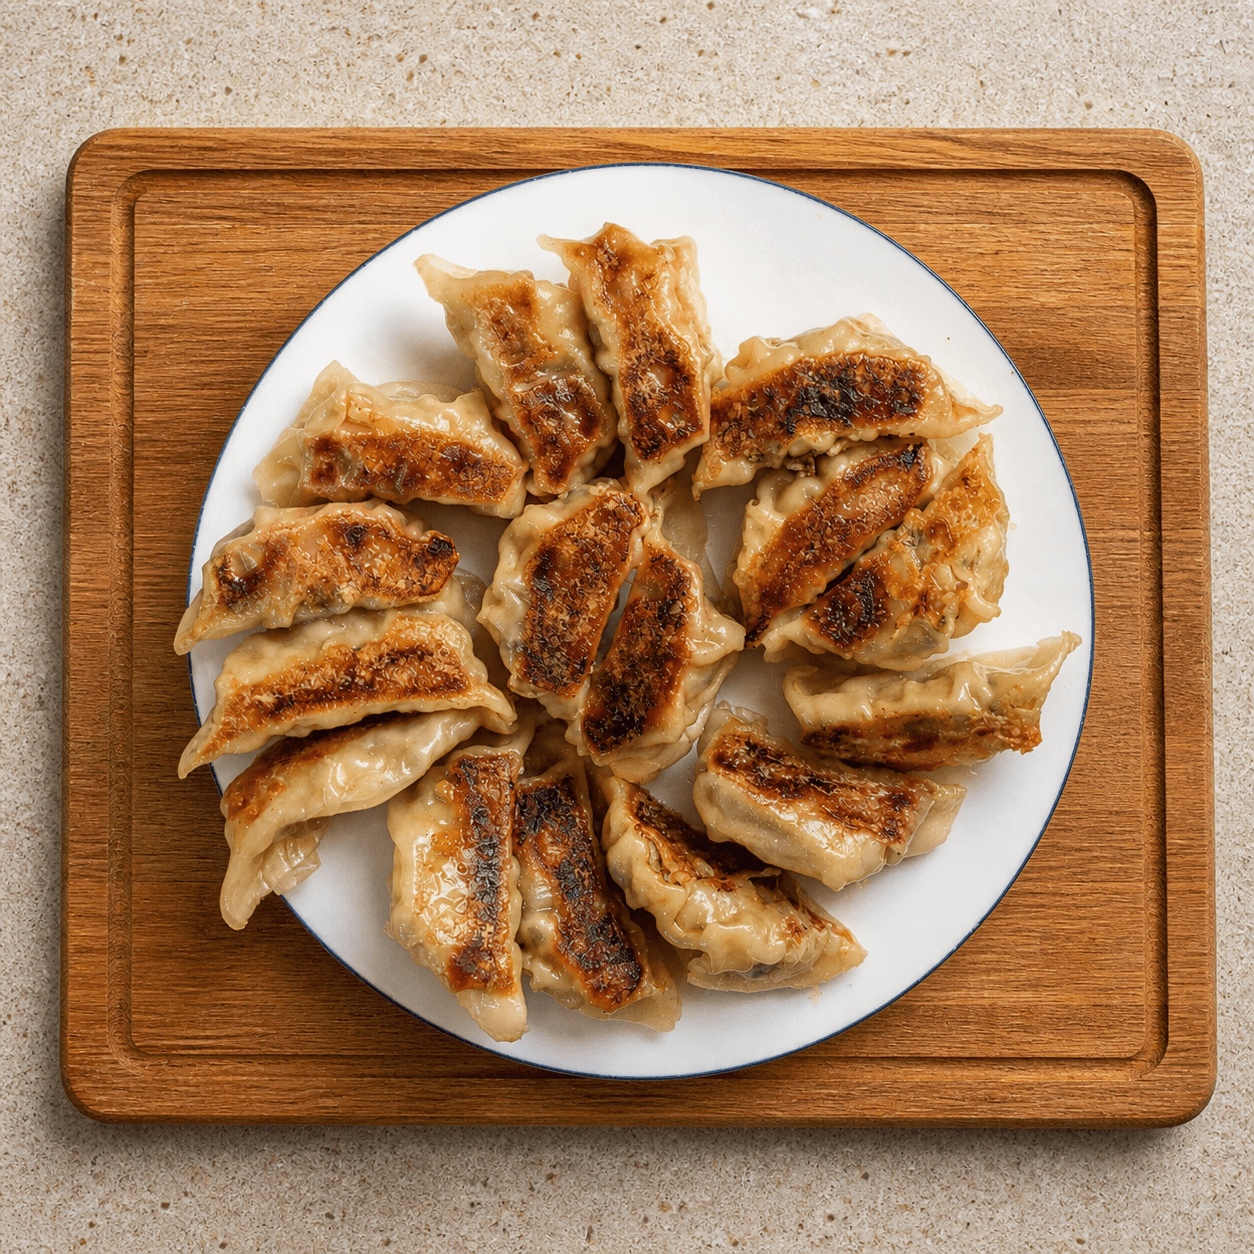
- You'll know it's done when the sizzle turns crisp and dry, and the gyoza visibly separate from the pan when nudged with a spatula.
- The lacy cornflour crust should be set and golden.
- Use a spatula to make sure each gyoza is loose from the pan.
- Place a large flat plate over the pan, then flip the whole thing in one motion — the gyoza disc lands crispy-side-up.
- If they don't release cleanly, plate them individually with the spatula instead.
- 🥬 Squeeze the cabbage hard: If your hand isn't tired, you didn't squeeze enough. Wet filling = soggy gyoza. The single biggest fixable mistake.
- 💪 Mix the filling for 2–3 full minutes: The protein has to bind. Lazy mixing gives loose, crumbly filling that falls out of the wrapper.
- 🥟 Don't overfill: 1 tablespoon max. Overfilling makes sealing impossible and the gyoza burst when steamed.
- 💧 Cornflour, not flour: Cornflour creates the clear lacy crust. Wheat flour goes cloudy and doesn't crisp the same way.
- 🔥 Use a non-stick pan: Stainless steel works but you'll lose half your gyoza to sticking. A good non-stick is the easy mode.
- 🧊 Freeze a backup batch: Make 60, cook 30, freeze 30. Future-you will be thrilled when dinner is 10 minutes away.
- 🍶 Don't substitute the rice vinegar in the dipping sauce: It's the brightness that cuts through everything. White vinegar is too sharp; balsamic is wrong universe.
How to Serve
The traditional Japanese way is the simplest and probably still the best: hot gyoza with the dipping sauce above. Mix the soy sauce, mirin, sesame oil, rice vinegar, and chopped green onion in a small bowl, give it a stir, and dip each gyoza as you go. The bright vinegar and sesame oil cut through the richness of the filling perfectly.
Want to Take It Further?
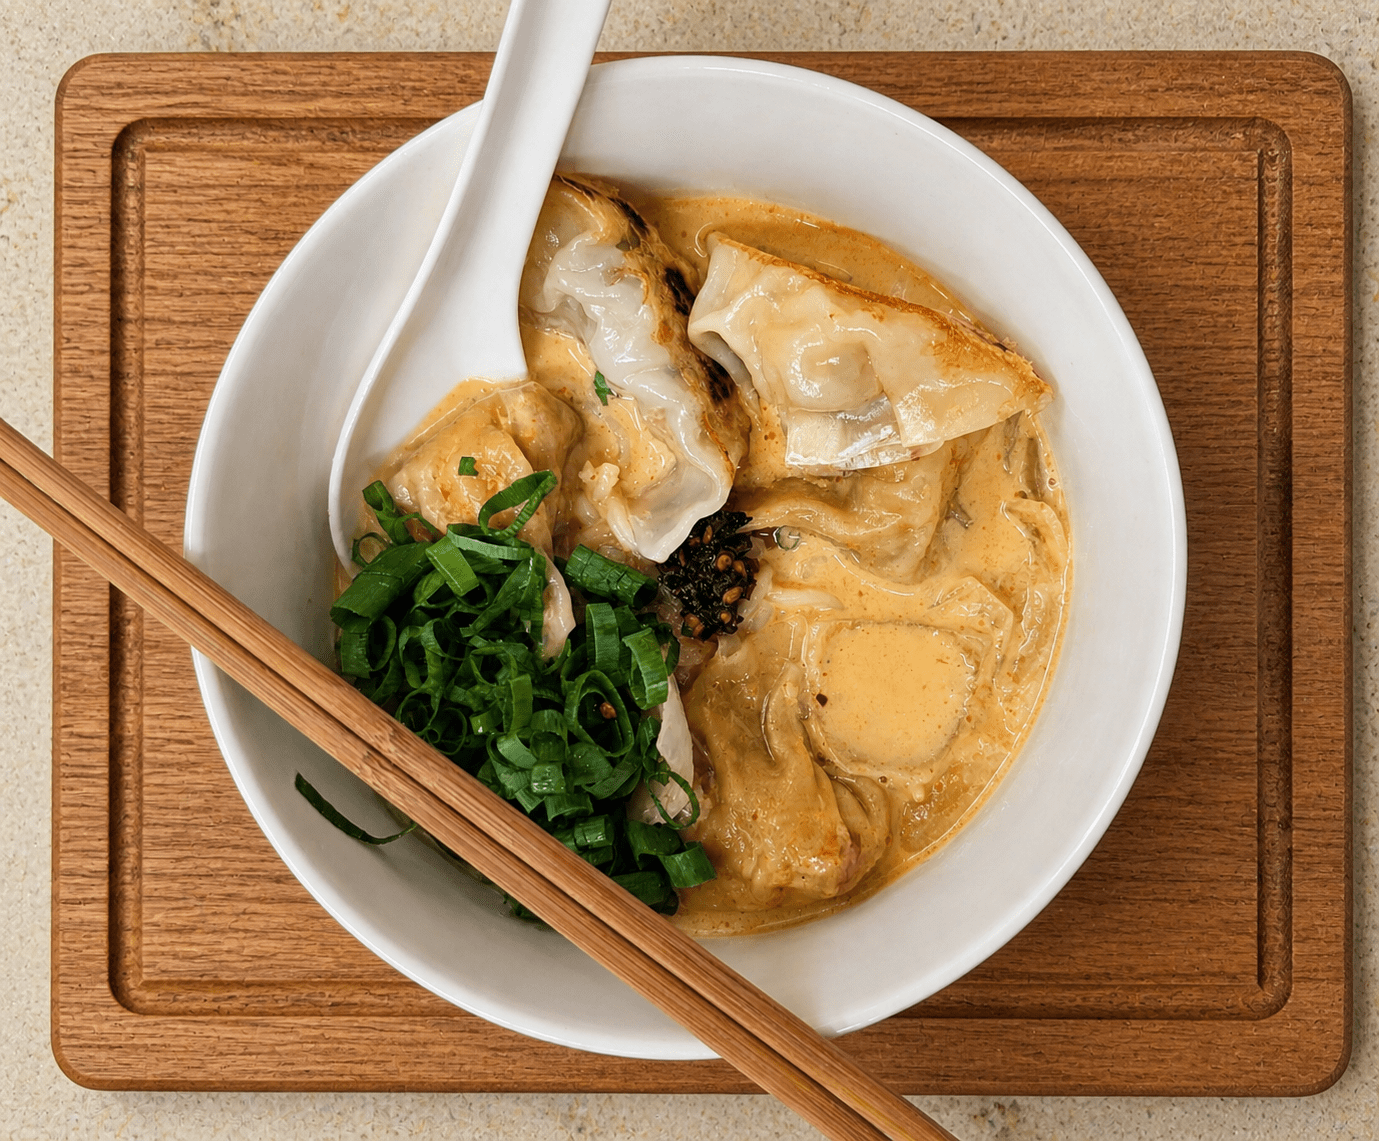
Gyoza are great solo, but they're even better as part of a bigger meal. Two ways I love serving them:
Frequently Asked Questions
Drop a comment below and let me know how the gyoza turned out — and which filling you went with. If you served them on something good, I want to hear about it. For more in this style, try my dark egg noodle chicken stir fry or my udon chicken soup.