
The Crispiest Homemade Fried Chicken
(buttermilk recipe)
This buttermilk fried chicken recipe actually delivers on crispy. The secret is a buttermilk marinade that tenderizes overnight, a seasoned flour coating with one extra trick for maximum crunch, and a simple rule: coat each piece and fry it immediately. No fancy equipment, no thermometer required — golden every single time.

Crispy buttermilk fried chicken — golden crust, juicy inside
Why This Buttermilk Fried Chicken Recipe Works
Most fried chicken recipes are vague about the details that actually matter. Here is what makes this buttermilk fried chicken recipe different. The buttermilk does not just flavour the chicken — the acidity breaks down the proteins and keeps the meat incredibly juicy even after frying. Buttermilk is also thicker than regular milk, which means it clings better to the meat and gives the flour coating something to grip.
The second trick: dripping a few drops of the leftover marinade directly into the seasoned flour creates irregular, craggy bits in the coating. Those bits are where the crunch lives. Finally, the coat-and-fry-immediately rule. Flour-coated chicken that sits absorbs moisture and turns limp before it even hits the oil.
How to Make This Crispy Buttermilk Fried Chicken Recipe
- Combine garlic powder, paprika, smoked paprika, curry powder, salt, and pepper in a bowl. Mix well.
- This blend gets used in two places — the marinade and the flour — so make it all at once.
- Add half the seasoning mix to the buttermilk and stir together. Add the chicken, making sure everything is well coated.
- Cover and refrigerate for at least 4 hours. Overnight is better.
- Mix the remaining seasoning into the flour.
- Now the trick: drip a few drops of the buttermilk marinade into the flour and use your fingers to create small clumps. These irregular bits become extra-crunchy patches on the crust.
- Preheat vegetable oil to 180°C in a deep pot.
- No thermometer? Drop a small piece of flour in — it should sizzle and float immediately. If it sinks or burns fast, the temperature is off.
- Take one piece of marinated chicken, press it firmly into the seasoned flour so every surface is coated, then place it directly into the hot oil.
- Do not flour all pieces in advance. Coat one, fry it, then move to the next.
- Fry until golden brown and crispy. Avoid crowding the pot so the oil temperature stays stable.
- Rest on a wire rack — not paper towels — while you fry the remaining pieces.
What to Serve with This Buttermilk Fried Chicken Recipe
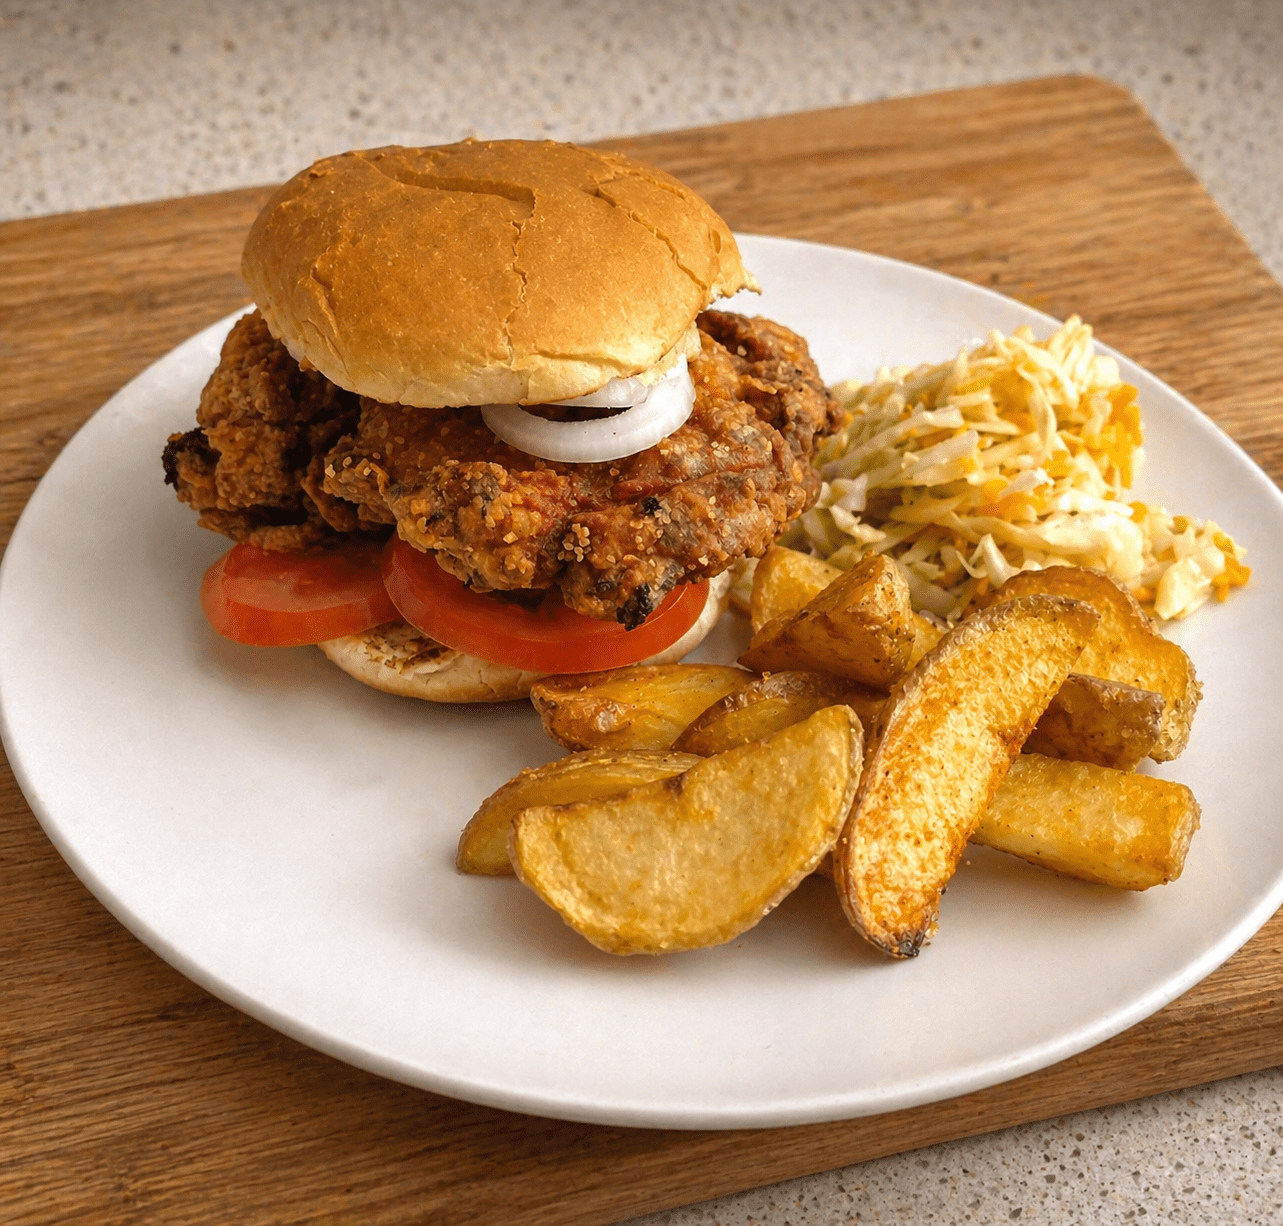
This crispy buttermilk fried chicken goes best with homemade potato wedges and a simple coleslaw with homemade McDonald's sauce. For the wedges, toss in olive oil, paprika, and salt, then roast at 200°C for 35 minutes. The creamy coldness of coleslaw next to hot, crispy fried chicken is a combination that just works.
- 🍗 Use thighs: Boneless chicken thighs have more fat than breast meat which keeps them juicy during frying. Breasts work but are more likely to dry out before the crust is done.
- 🌡️ Oil temperature: Keep it at 180°C throughout. Too hot and the crust burns before the chicken cooks through. Too cool and the coating soaks up oil and goes greasy.
- 🧂 Season both: The seasoning goes into both the buttermilk marinade and the flour. Seasoning only the flour means the meat itself is bland inside the crust.
- 🪨 Press the coating: When coating in flour, press firmly and squeeze the chicken slightly. This ensures the coating sticks and those craggy bits form properly.
- 🧺 Wire rack: Rest fried pieces on a wire rack, not paper towels. Paper towels trap steam underneath which softens the crust immediately.
Frequently Asked Questions
Drop a comment below and let me know how this buttermilk fried chicken recipe turned out. Did you marinate overnight or just 4 hours? I want to hear if you noticed the difference. If you enjoyed this, the crispy fried tofu uses a similar technique and is just as satisfying. Tag your photos and show off that crunch.