
No Knead Bread Buns
(crusty, airy + egg salad)
This no knead bread buns recipe is proof that great bread does not require a stand mixer, a lot of skill, or hours of active work. Just flour, water, yeast, and salt — mixed in minutes and then left to do its thing. The no knead method uses stretch and fold sessions over four hours to build the gluten structure that gives these buns their open crumb and crispy crust. No kneading. No stress. Serve them stuffed with the egg salad below and you have one of the best simple lunches you can make.
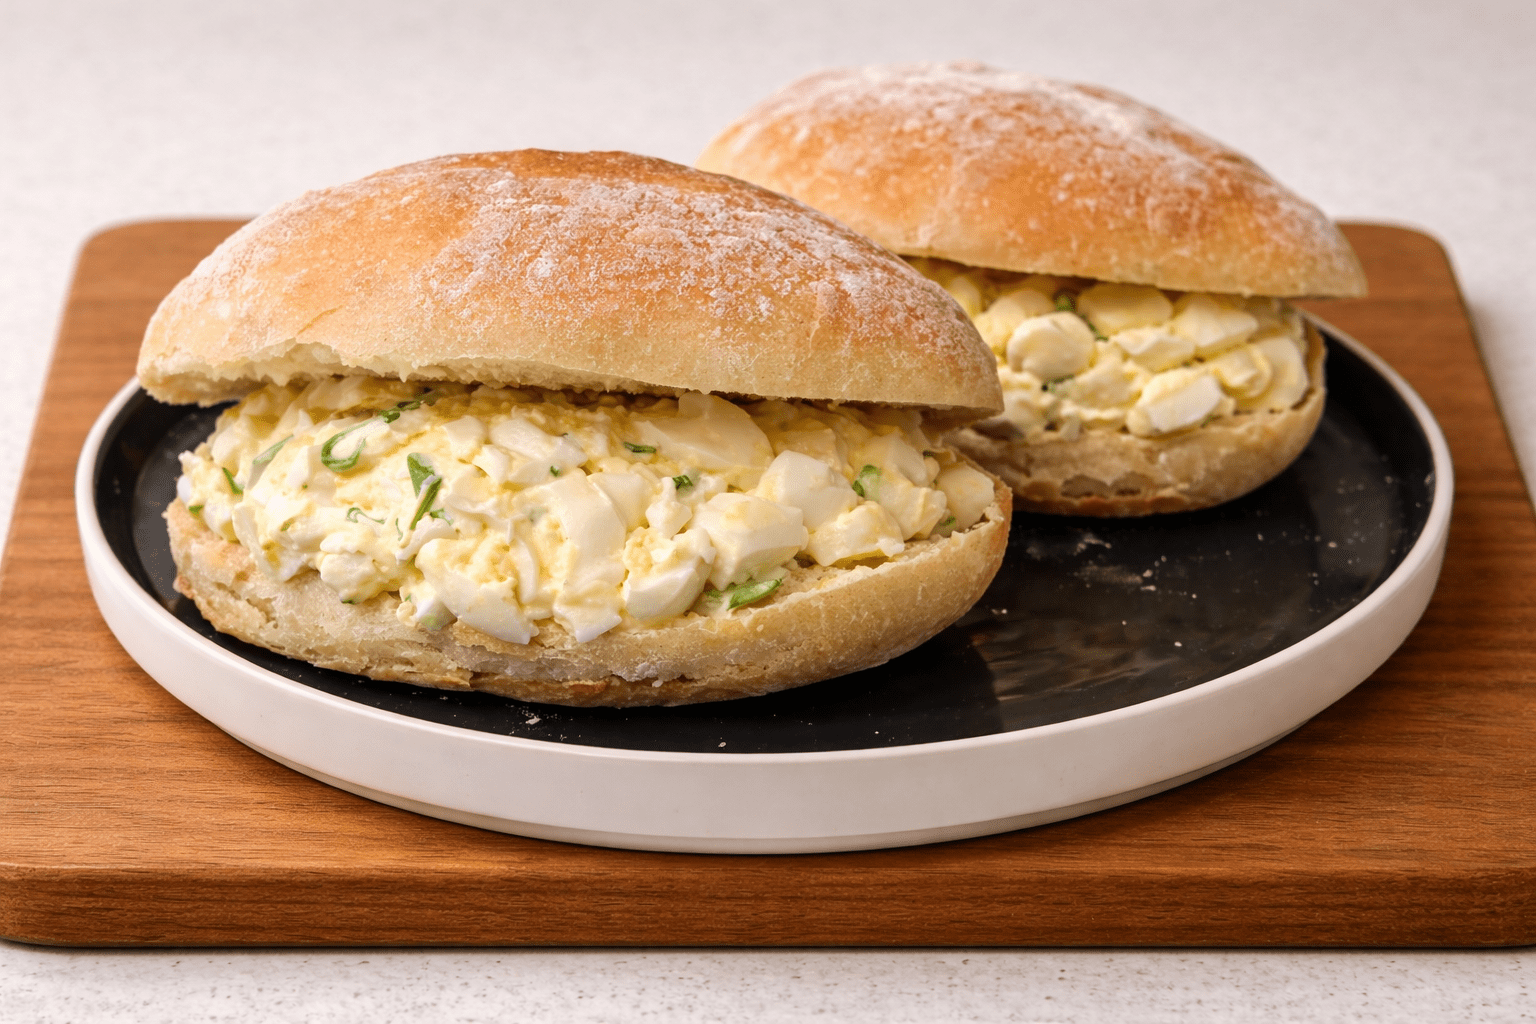
No knead bread buns with egg salad — crusty, airy, and one of the best lunches you can make
Why This No Knead Bread Buns Recipe Works
Traditional bread develops gluten through kneading — forcing the flour proteins to link into a strong, elastic network. The no knead method does the same thing, just differently. Time replaces effort. A wet, sticky dough combined with occasional stretch and fold sessions over four hours builds exactly the same gluten structure — and because the dough stays wetter, the result is a more open, airy crumb with a crispier crust than a standard kneaded bun.
The stretch and fold step is not complicated. Four gentle pulls over four hours, each one building a little more structure into the dough. By the time you are ready to shape, you will be able to see the gluten network when you pull the dough — long, elastic strands that tell you it is ready.
How to Make No Knead Bread Buns, Step by Step
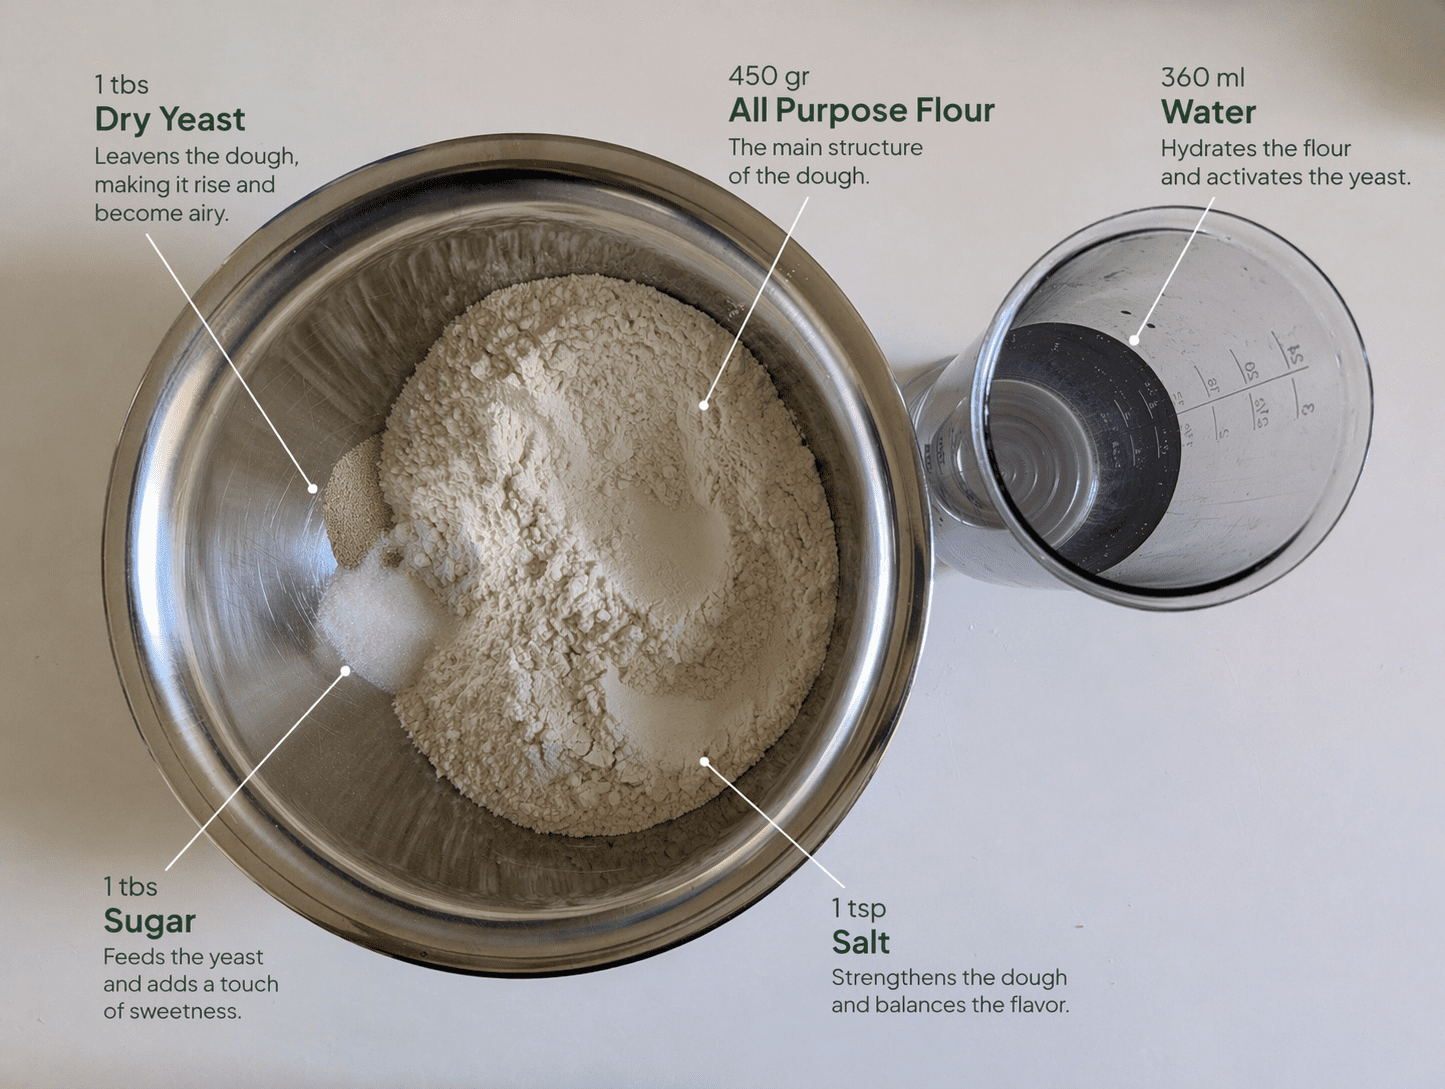
- In a large bowl, combine the flour, yeast, sugar, and salt. Mix the dry ingredients first.
- Add the warm water and mix with a wooden spoon until everything comes together. The dough will look very shaggy and rough — that is exactly right.
- With very wet hands, work the dough until it no longer feels grainy to the touch. The dough should be wet and sticky — not smooth and dry.
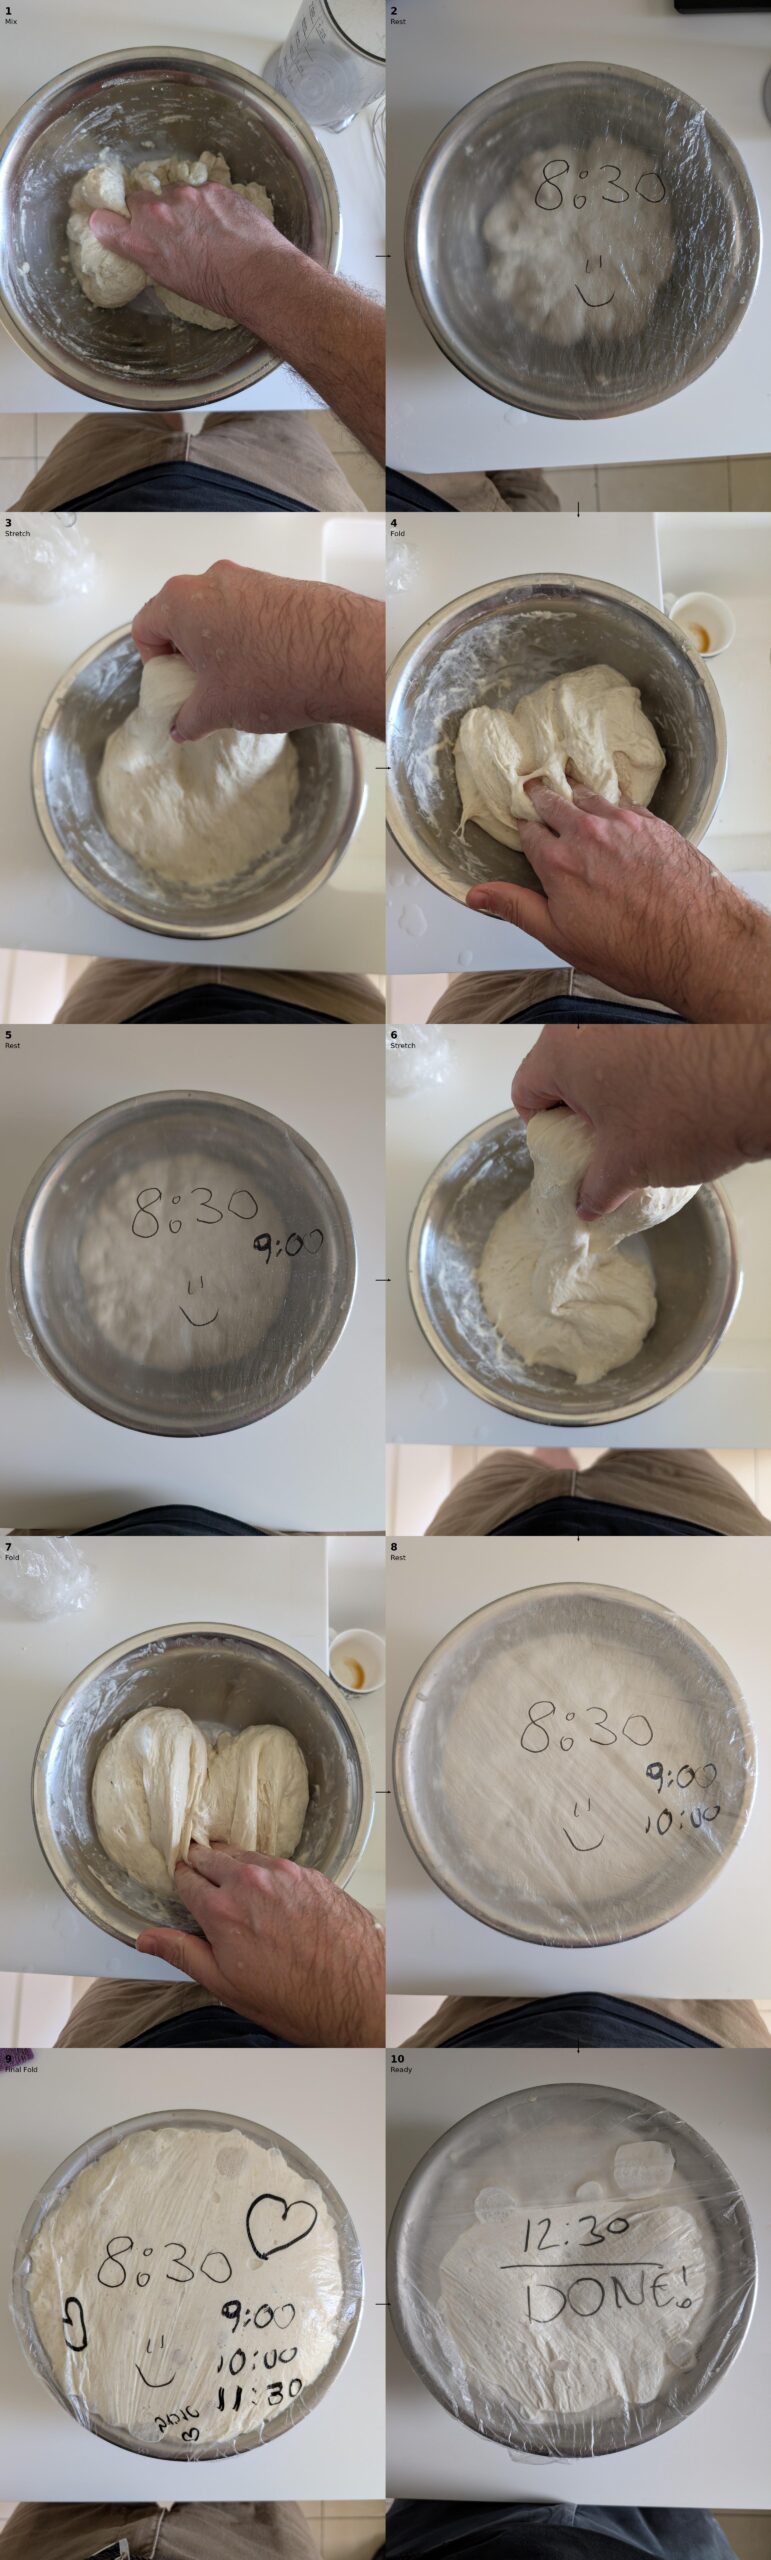
- Cover the bowl with plastic wrap, note the time, and set aside at room temperature.
- Perform four stretch-and-fold sets at: 30 min, 1 hour, 2 hours, and 3 hours. Each one takes about 30 seconds.
- To stretch and fold: with a wet hand, reach under the dough, stretch it upward as far as it will go without tearing, then fold it back over itself. Rotate the bowl 90° and repeat — four folds per set. Re-cover after each set.
- After each set, re-cover and leave it alone until the next mark.
- The dough should have increased significantly in size and feel light and gassy.
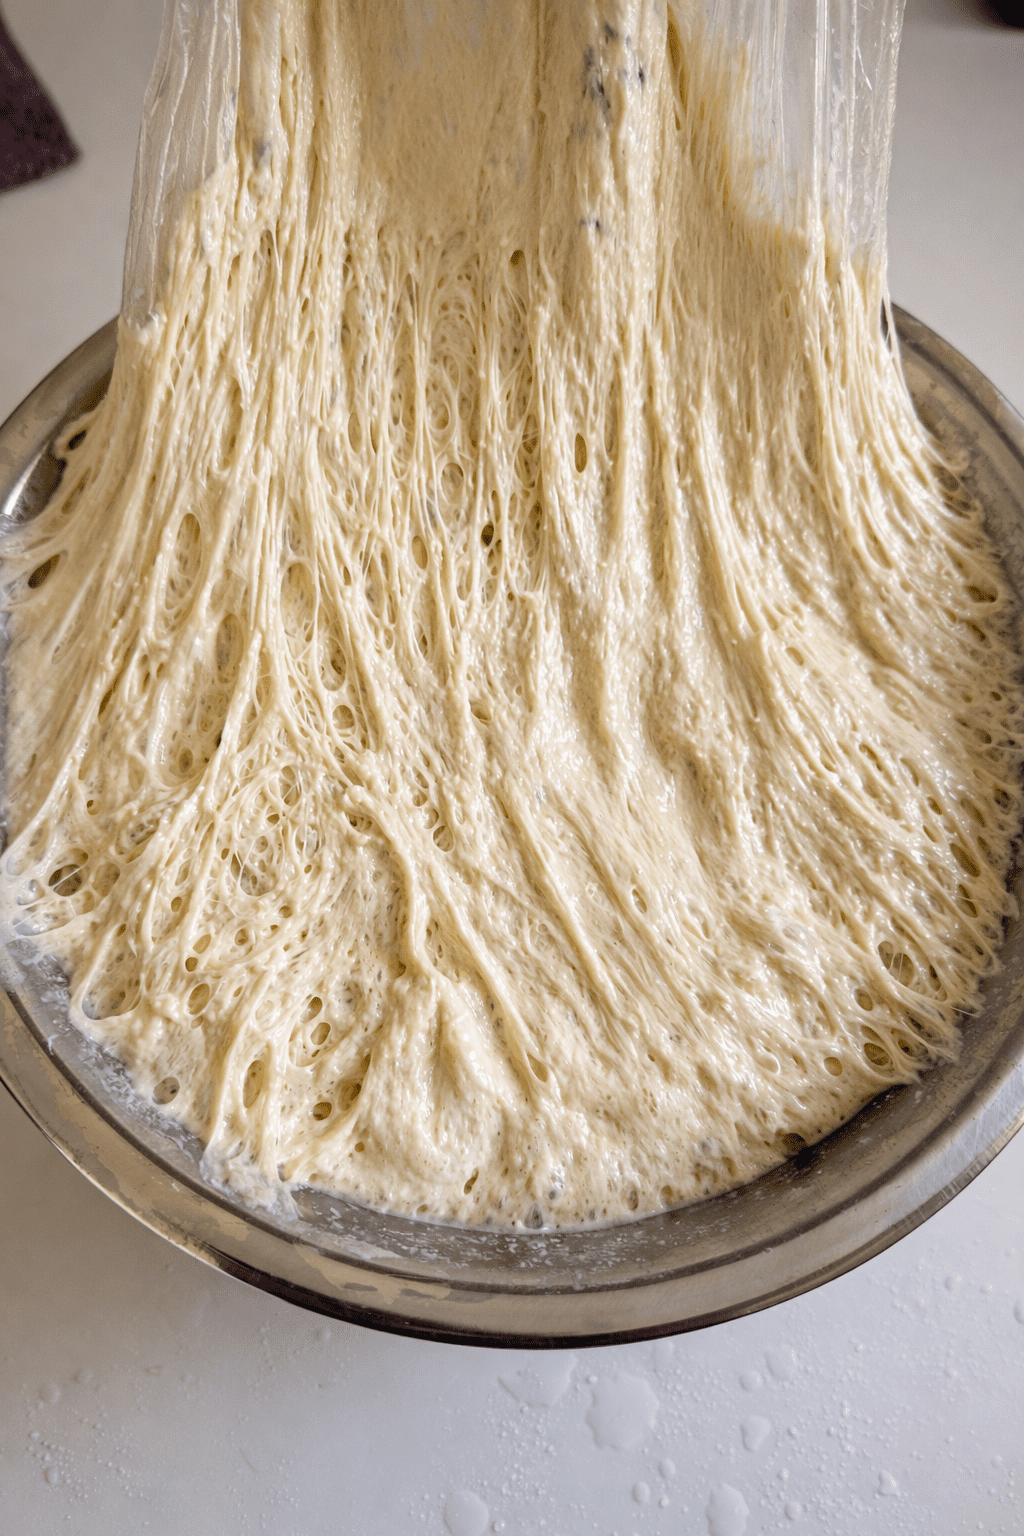
- The real test: pull the dough gently. If you can see long, elastic strands of gluten stretching as you pull — that open, web-like structure — it is ready to shape.
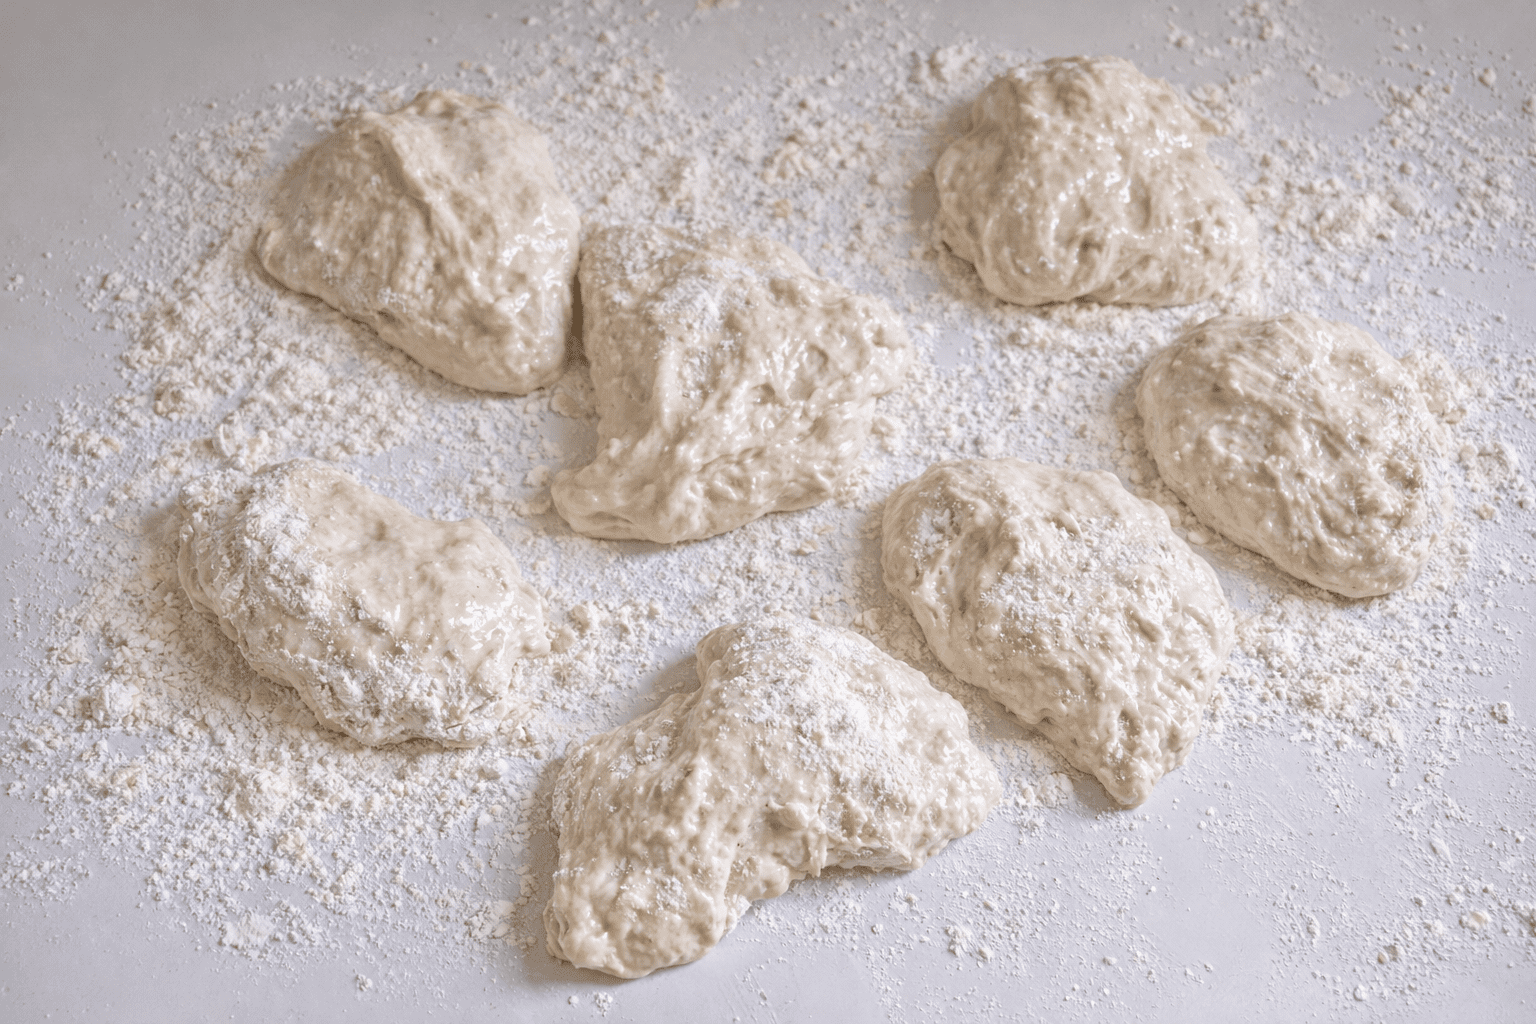
- Dust a work surface generously with flour.
- With wet hands, pull out roughly tennis ball-sized pieces of dough from the bowl and place them on the floured surface. Aim for 8 even pieces.
- Preheat your oven to 200°C (390°F) now. Place an empty baking tray on the bottom rack — you will add water to it later to create steam.
- Take each piece and gently stretch its edges outward, then fold them into the centre. Work around the piece, folding inward from all sides. Be gentle — you want to build surface tension without pressing out all the air.
- Pinch the seam together firmly, then place the bun seam-side down on a lined baking tray.
- Repeat with all pieces. Dust the tops lightly with flour. Score the top of each bun with a sharp knife just before baking.
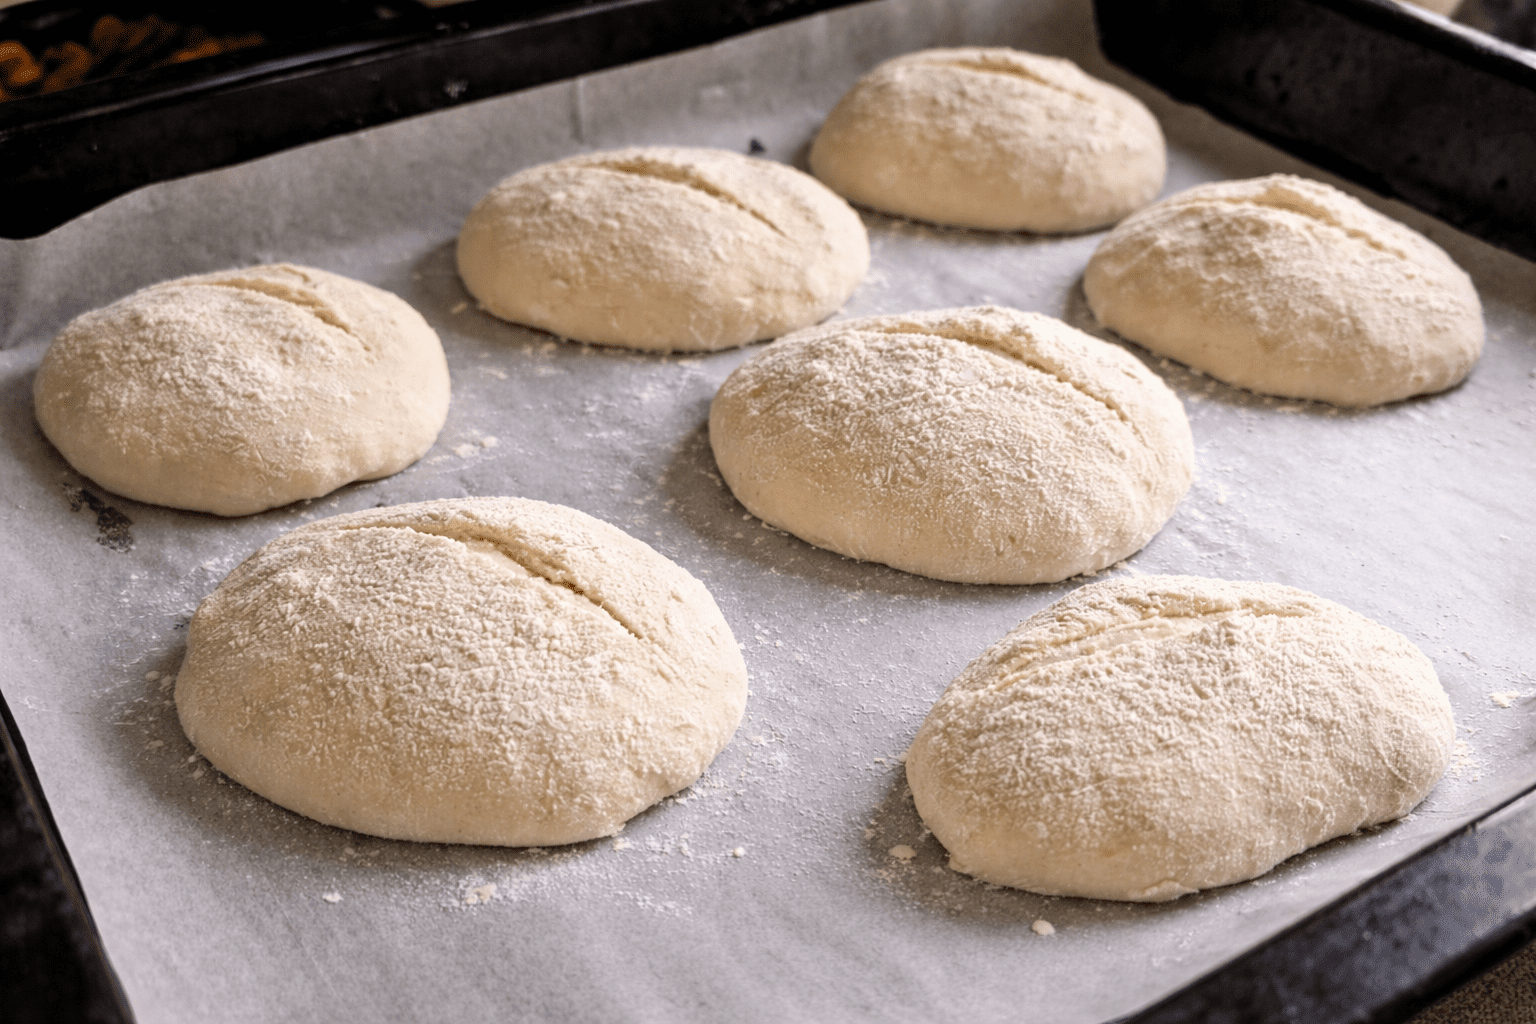
- Pour some water into the hot empty tray on the bottom rack — this creates steam which helps the crust form properly.
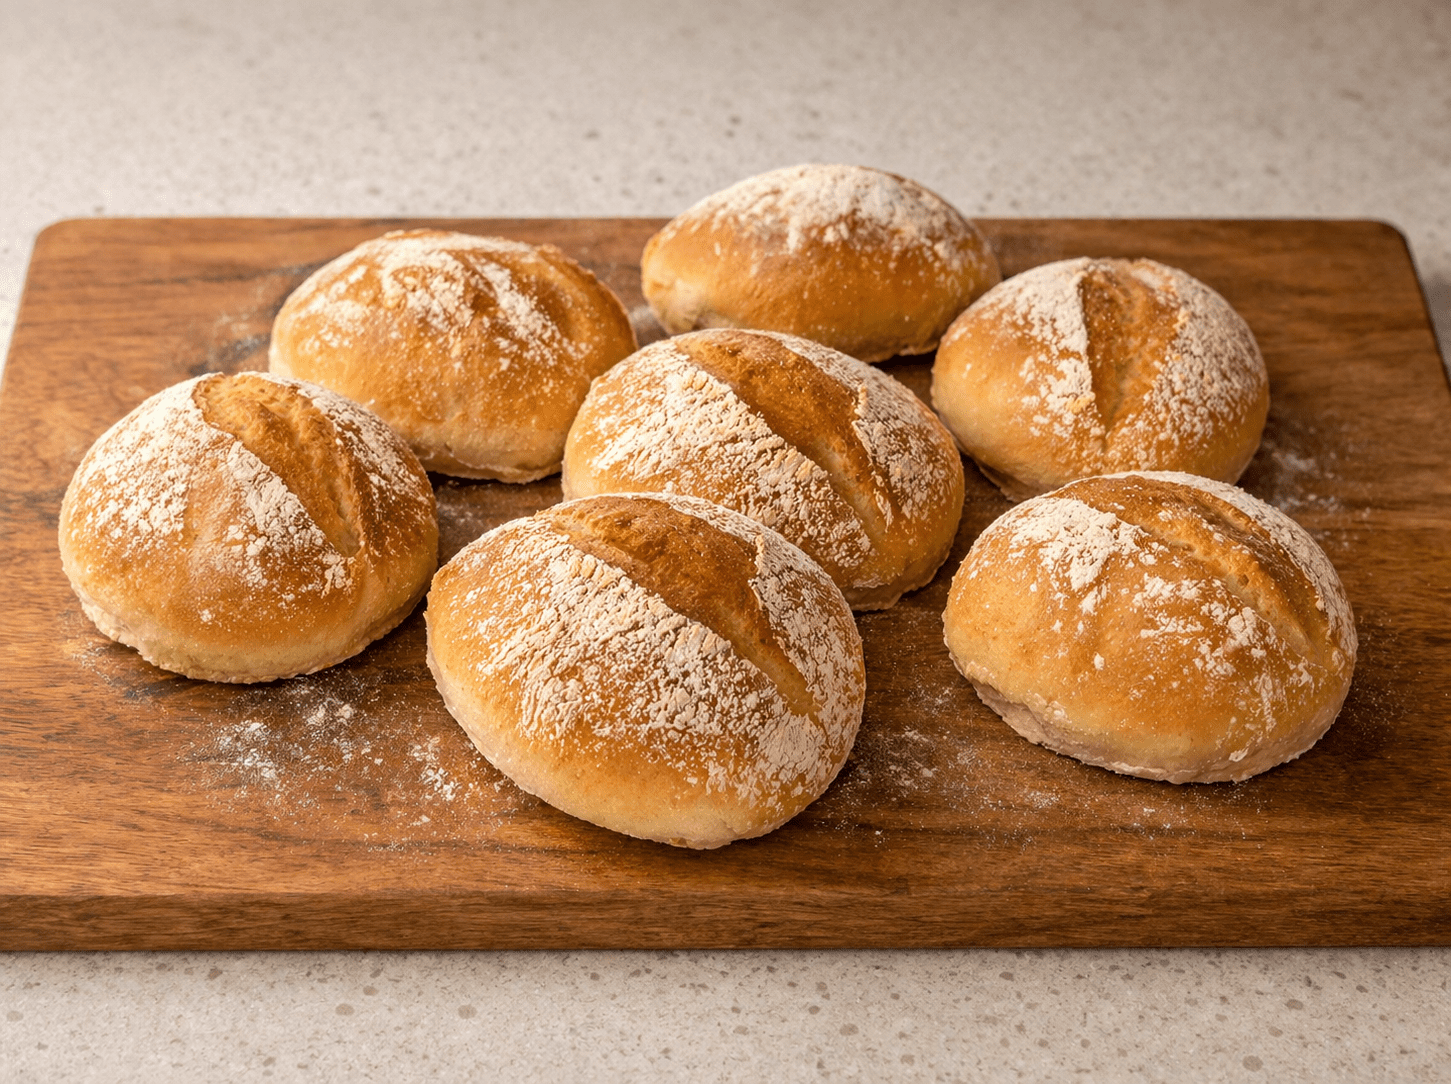
- Place the buns in the oven and bake for 30 minutes, or until deeply golden brown all over.
- Transfer to a wire rack to cool for at least 10 minutes before cutting.
What to Fill Them With: Classic Egg Salad
These no knead buns are good with anything — butter, cheese, deli meat — but the combination that made this recipe is a simple egg salad with one technique that makes all the difference: separating the yolks and whites before mixing. The yolks become the dressing base, the whites stay as chunky pieces inside. The result looks better and tastes more interesting than a standard mashed egg salad.
- Bring a pot of salted water to a boil. Add the eggs and cook for 10 minutes for fully set yolks, or 8 minutes if you prefer them slightly soft.
- Transfer to cold water immediately, then peel.
- Separate the yolks into one bowl and the whites into another.
- To the yolks, add the mayonnaise, mustard, lemon juice, green onions, dill, and salt. Mash and stir until you have a smooth, unified dressing. If too thick, loosen with a small splash of olive oil or water.
- Chop the egg whites as chunky or fine as you like, then fold them into the yolk dressing.
- Split the buns, pile in the egg salad, and serve immediately.
- 💧 Keep your hands wet: Throughout mixing and shaping, wet hands are your best tool. The dough is meant to be sticky — fight the urge to flour your hands.
- ⏱️ Don't rush the proof: Four hours is four hours. Cutting it short means underdeveloped gluten and dense buns. Use the gluten stretch test before shaping.
- 🌡️ Water tray for steam: The tray of water in the bottom of the oven is what gives you that professional bakery crust on these no knead buns. Do not skip it.
- ✂️ Score before baking: A quick slash across the top lets the buns expand in a controlled way and gives you a better looking crust.
- 🍞 Cool on a rack: The crust softens on a flat surface. A wire rack keeps airflow underneath so the crust stays crispy as the buns cool.
- ❄️ Storage: Best eaten the day they are baked. Store at room temperature in a paper bag for up to 2 days. Freeze individually for up to 1 month and reheat in a hot oven for 8 minutes.
Frequently Asked Questions
Drop a comment below and let me know how the no knead buns turned out. Did you use the egg salad or fill them with something else? If you enjoyed this, the no knead Dutch oven bread uses the same dough in a completely different format — same method, much thicker crust. Tag your photos and show off that crumb.